✅ Step 1: Sign Up for RunPod + Claim Bonus
Go to runpod’s website.
Use this link to get a $5–$500 bonus after loading $10:
👉 https://runpod.io?ref=bi27a9jm
🖥️ Step 2: Click on "Pods"
On the left-hand sidebar, click on Pods
(Insert circled screenshot here)

⚙️ Step 3: Filter for Community Cloud + Cheap GPUs
Set to Community Cloud
Choose a GPU with at least 24GB VRAM (e.g., RTX 4090 at $0.34/hr)
Sort by vRAM and scroll to the cheaper options
(Insert GPU filter screenshot)

📦 Step 4: Select a Template
Click on “Templates”
Choose: One-click ComfyUI WAN 2.1
If that fails, try ComfyUI with Flux (One Click)
(Insert template selection image)


🛠️ Step 5: Adjust Disk Settings
Container Disk: 100 GB
Volume Disk: 250 GB
Click Set Overrides
Then click Deploy On Demand

🔄 Step 6: Wait for Pod to Deploy
It may take 5–10 minutes to load
Once ready, the Connect button will be clickable
(Insert screenshot of active Pod)


💻 Step 7: Open Terminal + Backend
Click Connect → Open Web Terminal
Once you open the web terminal, type in Jupyter server list. This will provide a token which you will enter as the password
Click on the ComfyUI link to open the frontend

📥 Step 8: Install the Flux Checkpoint
Go to Models → UNET
Click the + icon
Paste the Flux checkpoint link and start downloading
-insert this prompt in the terminal in the UNET Folder = wget -O/workspace/ComfyUI/models/checkpoints/flux1-dev-fp8.safetensors "https://huggingface.co/lllyasviel/flux1_dev/resolve/main/flux1-dev-fp8.safetensors"
I recommend watching the youtube tutorial to get this right. (https://www.youtube.com/watch?v=T81K07cnQuw)
🎛️ Step 9: Load the Workflow
When prompted in ComfyUI, select:
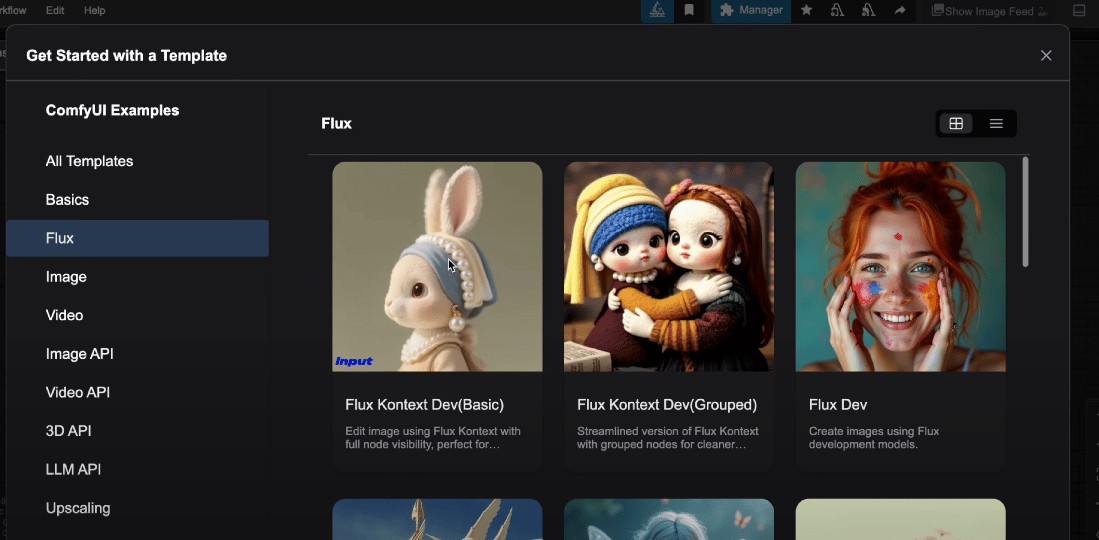
Get Started with Template → Flux → Flux Dev

🧪 Step 10: Generate a Prompt
Wait for model download to complete
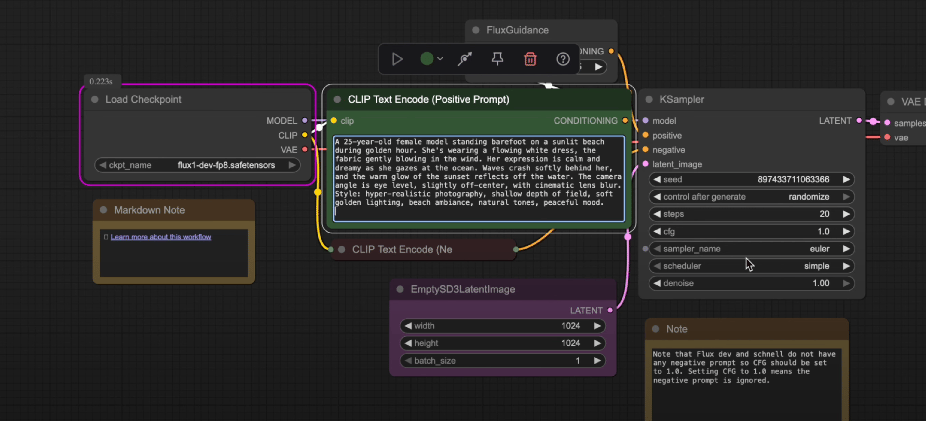
Type in a prompt like:
Model standing on the beach during golden hourOptional: Increase steps to 28+ for better quality

✅ That’s It!
You just created your first AI influencer using ComfyUI + Flux on RunPod.
Test different prompts, adjust steps, and explore styles.
💡 Need Help?
Drop questions under the video or reply to this email — I got you.
